
Tensorflow is one of the most-used deep-learning frameworks. It’s arguably the most popular machine learning platform on the web, with a broad range of users from those just starting out, to people looking for an edge in their careers and businesses.
Not all users know that you can install the TensorFlow GPU if your hardware supports it. We’ll discuss what Tensorflow is, how it’s used in today’s world, and how to install the latest TensorFlow version with CUDA, cudNN, and GPU support in Windows, Mac, and Linux.
Introduction to TensorFlow
TensorFlow is an open-source software library for machine learning, created by Google. It was initially released on November 28, 2015, and it’s now used across many fields including research in the sciences and engineering.
The idea behind TensorFlow is to make it quick and simple to train deep neural networks that use a diversity of mathematical models. These networks are then able to learn from data without human intervention or supervision, making them more efficient than conventional methods. The library also offers support for processing on multiple machines simultaneously with different operating systems and GPUs.
Read also
How to Keep Track of TensorFlow/Keras Model Development with Neptune
Debug and Visualize Your TensorFlow/Keras Model: Hands-on Guide
TensorFlow applications
TensorFlow is a library for deep learning built by Google, it’s been gaining a lot of traction ever since its introduction early last year. The main features include automatic differentiation, convolutional neural networks (CNN), and recurrent neural networks (RNN). It’s written in C++ and Python, for high performance it uses a server called a “Cloud TensorFlow” that runs on Google Cloud Platform. It doesn’t require a GPU, which is one of its main features.
The newest release of Tensorflow also supports data visualization through matplotlib. This visualization library is very popular, and it’s often used in data science coursework, as well as by artists and engineers to do data visualizations using MATLAB or Python / R / etc.
Installing the latest TensorFlow version with CUDA, cudNN, and GPU support
Let’s see how to install the latest TensorFlow version on Windows, macOS, and Linux.
Windows
Prerequisite
- Python 3.6–3.8
- Windows 7 or later (with C++ redistributable)
- Check https://www.tensorflow.org/install/so… For latest version information
Steps
1) Download Microsoft Visual Studio from:
https://visualstudio.microsoft.com/vs…
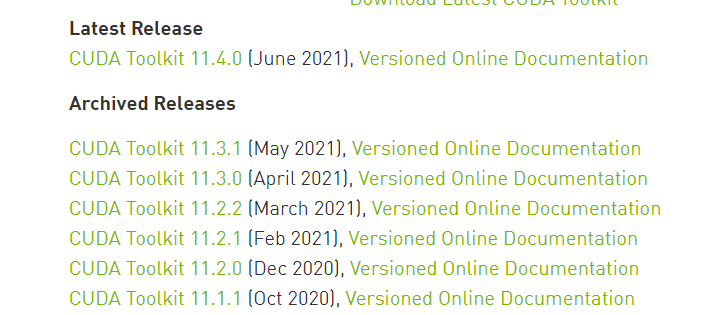
2) Install the NVIDIA CUDA Toolkit (https://developer.nvidia.com/cuda-too…), check the version of software and hardware requirements, we’ll be using :
| Version | Python version | Compiler | Build tools | cuDNN | CUDA |
| tensorflow-2.5.0 | 3.6-3.9 | GCC 7.3.1 | Bazel 3.7.2 | 8.1 | 11.2 |
We will install CUDA version 11.2, but make sure you install the latest or updated version (for example – 11.2.2 if it’s available).
Click on the newest version and a screen will pop up, where you can choose from a few options, so follow the below image and choose these options for Windows.

Once you choose the above options, wait for the download to complete.

Install it with the Express (Recommended) option, it will take a while to install on your machine.
3) Now we’ll download NVIDIA cuDNN, https://developer.nvidia.com/cudnn
Check the version code from the TensorFlow site.
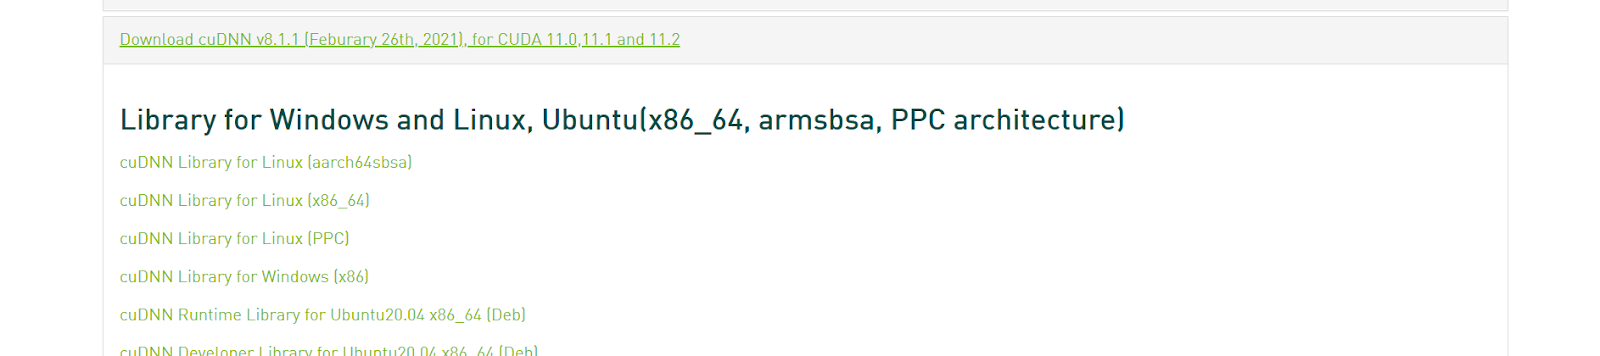
Now, check versions for CUDA and cuDNN, and click download for your operating system. If you can’t find your desired version, click on cuDNN Archive and download from there.
Once the download is complete, extract the files.

Now, copy these 3 folders (bin, include, lib). Go to C Drive>Program Files, and search for NVIDIA GPU Computing Toolkit.

Open the folder, select CUDA > Version Name, and replace (paste) those copied files.
Now click on the bin folder and copy the path. It should look like this: C:Program FilesNVIDIA GPU Computing ToolkitCUDAv11.2bin.
On your PC, search for Environment variables, as shown below.
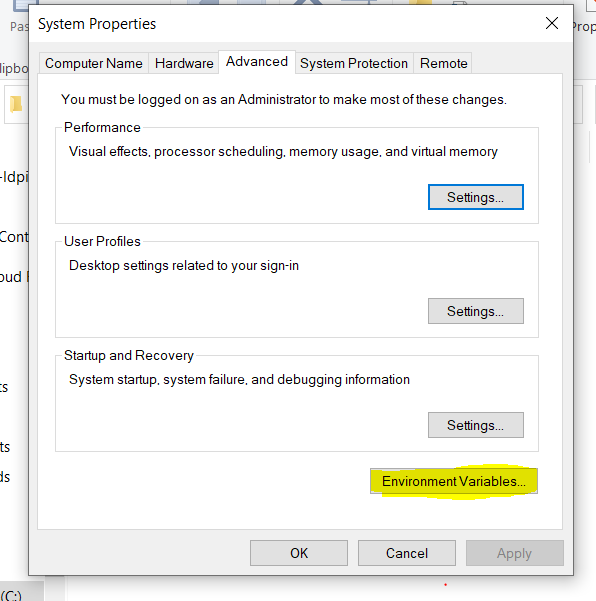
Click on Environment Variables on the bottom left. Now click on the link which states PATH.
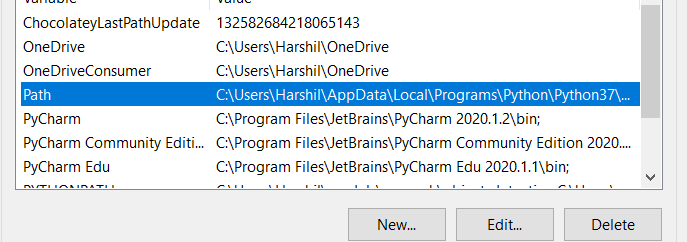
Once you click on the PATH, you will see something like this.

Now click on New (Top Left), and paste the bin path here. Go to the CUDA folder, select libnvvm folder, and copy its path. Follow the same process and paste that path into the system path. Next, just restart your PC.
4) Installing Tensorflow
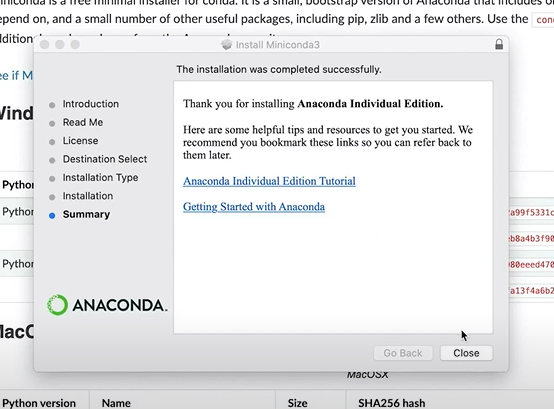
Open conda prompt. If not installed, get it here → https://www.anaconda.com/products/individual.
Now copy the below commands and paste them into the prompt (Check for the versions).
conda create --name tf2.5 python==3.8
conda activate tf2.5 (version)
pip install tensorflow (With GPU Support) //Install TensorFlow GPU command, pip install --upgrade tensorflow-gpu
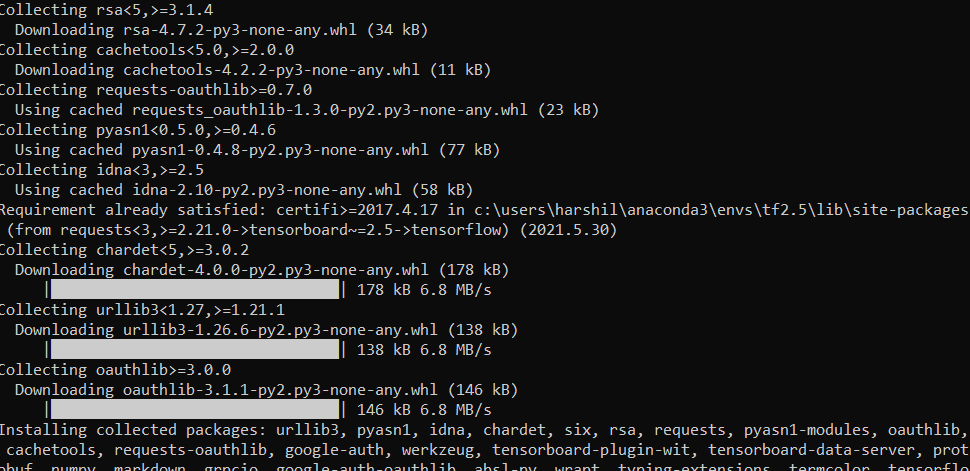
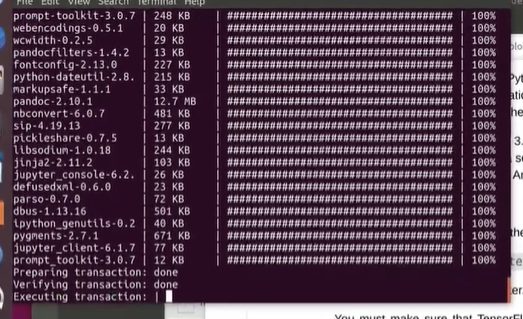
You’ll see an installation screen like this. If you see any errors, Make sure you’re using the correct version and don’t miss any steps.
We’ve installed everything, so let’s test it out in Pycharm.
Test
To test the whole process we’ll use Pycharm. If not installed, get the community edition → https://www.jetbrains.com/pycharm/download/#section=windows.
First, to check if TensorFlow GPU has been installed properly on your machine, run the below code:
# importing the tensorflow package
import tensorflow as tf
tf.test.is_built_with_cuda()
tf.test.is_gpu_available(cuda_only=False, min_cuda_compute_capability=None)
It should show TRUE as output. If it’s FALSE or some error, look at the steps.
Now let’s run some code.
For a simple demo, we train it on the MNIST dataset of handwritten digits. We’ll see through how to create the network as well as initialize a loss function, check accuracy, and more.
Configure the env, create a new Python file, and paste the below code:
# Imports
import torch
import torchvision
import torch.nn.functional as F
import torchvision.datasets as datasets
import torchvision.transforms as transforms
from torch import optim
from torch import nn
from torch.utils.data import DataLoader
from tqdm import tqdm
Check the rest of the code here -> https://github.com/aladdinpersson/Machine-Learning-Collection/blob/master/ML/Pytorch/Basics/pytorch_simple_CNN.py.
When you run the code, look for successfully opened cuda(versioncode).

Once the training started, all the steps were successful!
MacOS
MacOS doesn’t support Nvidia GPU for the latest versions, so this will be a CPU-only installation. You can get GPU support on a Mac with some extra effort and requirements.
Prerequisite
- Python 3.6–3.8
- macOS 10.12.6 (Sierra) or later (no GPU support)
- Check https://www.tensorflow.org/install/so… For the latest version information

You can install the latest version available on the site, but for this tutorial, we’ll be using Python 3.8. Also, check with the TensorFlow site for version support.
2) Prepare environment:
After installing Miniconda, open the command prompt.
conda install -y jupyter

This will take some time to install jupyter. Next, install the Mac tensorflow.yml file. You can also create a .yml file to install TensorFlow and dependencies (mentioned below).
dependencies:
    - python=3.8
    - pip>=19.0
    - jupyter
    - scikit-learn
    - scipy
    - pandas
    - pandas-datareader
    - matplotlib
    - pillow
    - tqdm
    - requests
    - h5py
    - pyyaml
    - flask
    - boto3
    - pip:
        - tensorflow==2.4
        - bayesian-optimization
        - gym
        - kaggle
Run the following command from the same directory that contains tensorflow.yml.
conda env create -f tensorflow.yml -n tensorflow
This installation might take a few minutes.
Activate the environment using the following command:
python -m ipykernel install --user --name tensorflow --display-name "Python 3.8 (tensorflow)"
Test
To test the whole process, we’ll use a Jupyter notebook. Use this command to start Jupyter:
jupyter notebook
Cope the below code and run on jupyter notebook.
import sys
import tensorflow.keras
import pandas as pd
import sklearn as sk
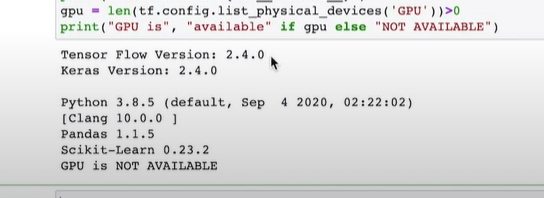
import tensorflow as tf
print(f"Tensor Flow Version: {tf.__version__}")
print(f"Keras Version: {tensorflow.keras.__version__}")
print()
print(f"Python {sys.version}")
print(f"Pandas {pd.__version__}")
print(f"Scikit-Learn {sk.__version__}")
gpu = len(tf.config.list_physical_devices('GPU'))>0
print("GPU is", "available" if gpu else "NOT AVAILABLE")
This might take some time, but you’ll see something like this with your installed versions.
Linux
We can install both CPU and GPU versions on Linux.
Prerequisite
- Python 3.6–3.8
- Ubuntu 16.04 or later
- Check https://www.tensorflow.org/install/so… for the latest version information
Steps
1) First download and install Miniconda from https://docs.conda.io/en/latest/miniconda.html
2) To install CUDA on your machine, you will need:
- CUDA capable GPU,
- A supported version of Linux,
- NVIDIA CUDA Toolkit (https://developer.nvidia.com/cuda-downloads).
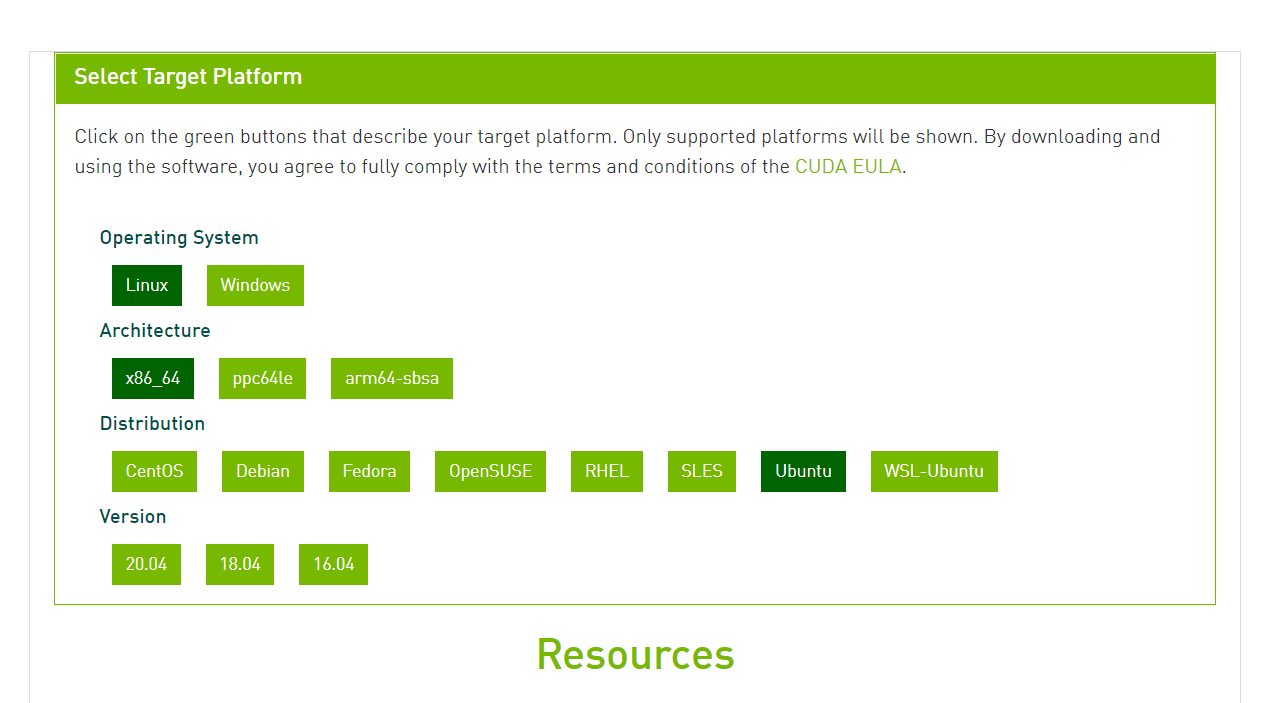
You can install CUDA by running,
$ sudo apt install nvidia-cuda-toolkit
After installing CUDA, run to verify the install:
nvcc -V
You’ll see it output something like this:
nvcc: NVIDIA (R) Cuda compiler driver
Copyright (c) 2005-2021 NVIDIA Corporation
Built on Sun_Jul_22_21:07:16_PDT_2019
Cuda compilation tools, release ‘version’
3) Now we’ll download NVIDIA cuDNN, https://developer.nvidia.com/cudnn
Check the version code from the TensorFlow site.
After downloading, extract the files:
tar -xvzf cudnn-10.1-linux-x64-'version'.tgz
Now, we’ll copy the extracted files to the CUDA installation path:
sudo cp cuda/include/cudnn.h /usr/lib/cuda/include/
sudo cp cuda/lib64/libcudnn* /usr/lib/cuda/lib64/
Setting up the file permissions of cuDNN:
$ sudo chmod a+r /usr/lib/cuda/include/cudnn.h /usr/lib/cuda/lib64/libcudnn*
4) Get the environment ready:
Export CUDA environment variables. To set them, run:
$ echo 'export LD_LIBRARY_PATH=/usr/lib/cuda/lib64:$LD_LIBRARY_PATH' >> ~/.bashrc
$ echo 'export LD_LIBRARY_PATH=/usr/lib/cuda/include:$LD_LIBRARY_PATH' >> ~/.bashrc
You can also set the environment with conda and jupyter notebook.
After installing Miniconda, open the command prompt.
conda install -y jupyter
Now, check with TensorFlow site for version, and run the below command:
conda create --name tensorflow python=3.8
To enter the environment:
conda activate tensorflow
Let’s create Jupyter support for your new environment:
conda install nb_conda
This will take some time to get things done.
To Install CPU only, use the following command:
conda install -c anaconda tensorflow
To Install both GPU and CPU, use the following command:
conda install -c anaconda tensorflow-gpu
To add additional libraries, update or create the ymp file in your root location, use:
conda env update --file tools.yml
Below are additional libraries you need to install (you can install them with pip).
dependencies:
    - jupyter
    - scikit-learn
    - scipy
    - pandas
    - pandas-datareader
    - matplotlib
    - pillow
    - tqdm
    - requests
    - h5py
    - pyyaml
    - flask
    - boto3
    - pip
    - pip:
        - bayesian-optimization
        - gym
        - kaggle
Test
There are two ways you can test your GPU.
First, you can run this command:
import tensorflow as tf
tf.config.list_physical_devices("GPU")
You will see similar output, [PhysicalDevice(name=’/physical_device:GPU:0′, device_type=’GPU’)]
Second, you can also use a jupyter notebook. Use this command to start Jupyter.
jupyter notebook
Now, run the below code:
import sys

import tensorflow.keras
import pandas as pd
import sklearn as sk
import tensorflow as tf

print(f"Tensor Flow Version: {tf.__version__}")
print(f"Keras Version: {tensorflow.keras.__version__}")
print()
print(f"Python {sys.version}")
print(f"Pandas {pd.__version__}")
print(f"Scikit-Learn {sk.__version__}")
gpu = len(tf.config.list_physical_devices('GPU'))>0
print("GPU is", "available" if gpu else "NOT AVAILABLE")
You’ll see results something like this:
TensorFlow Version: 'version'
Keras Version: 'version'-tf

Python 3.8.0
Pandas 'version'
Scikit-Learn 'version'
GPU is available
So, when you see a GPU is available, you successfully installed TensorFlow on your machine.
Conclusion
TensorFlow is a free and open-source software library for machine learning created by Google, and it’s most notably known for its GPU accelerated computation speed. We saw how to install TensorFlow on Windows, Mac, and Linux. I hope that this guide helps you get started with TensorFlow!
References and recommended reading:
- https://github.com/aladdinpersson/Machine-Learning-Collection/blob/master/ML/Pytorch/Basics/pytorch_simple_CNN.py
- https://www.youtube.com/watch?v=dj-Jntz-74g
- https://github.com/jeffheaton/t81_558_deep_learning/blob/master/install/tensorflow-install-jul-2020.ipynb
- https://www.tensorflow.org/guide/gpu
- https://www.liquidweb.com/kb/how-to-install-tensorflow-on-ubuntu-18-04/
- https://www.pyimagesearch.com/2019/12/09/how-to-install-tensorflow-2-0-on-macos/
- https://towardsdatascience.com/installing-tensorflow-gpu-in-ubuntu-20-04-4ee3ca4cb75d
